Miner King, tyttoot's dig-sell-upgrade mining game, went live on the App Store for iPhone and iPad and on the Mac App Store on 17 October 2026. It was already playable on the web and on Google Play, and the Play box at the end of this article links every store where it is live.
We played the web version the same morning in a 1280×800 desktop window, using the keyboard. We did not play the iPhone or Mac builds; the stores list the same game. Our first trip underground went badly, and that turned out to be the most useful thing we can tell a new miner.
What kind of game it is
You drive a small drill down from a surface camp. Digging through dirt and rock uncovers gems; you carry them back up, sell them in the shop and spend the cash on upgrades that let you dig faster, deeper and carry more. The catch is the battery. Every metre costs power, and if it runs out underground you are rescued, but you lose what you were carrying.
There is no timer and no opponent, so it suits short sessions: one trip down and back takes a couple of minutes.
The home screen
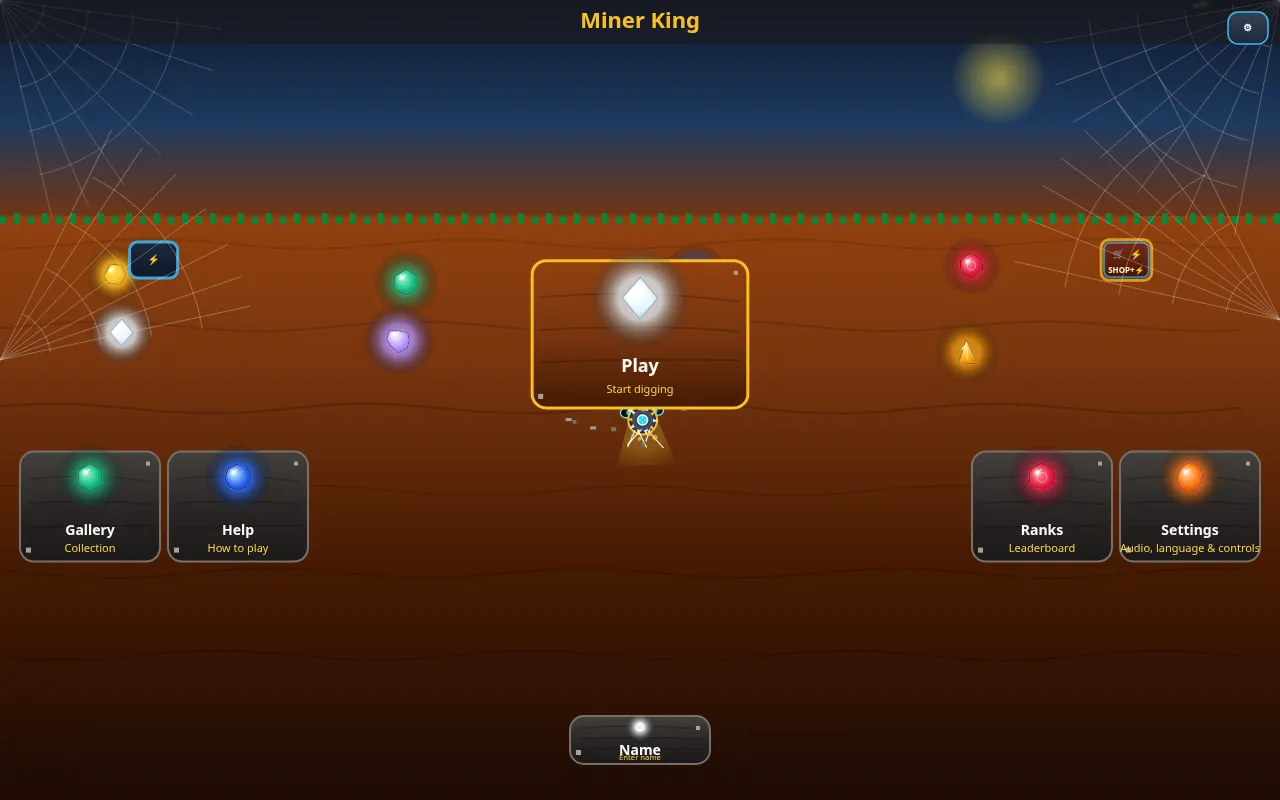
The Help card is worth one read before you start. It is short and it explains the two systems that matter, charging and controls:
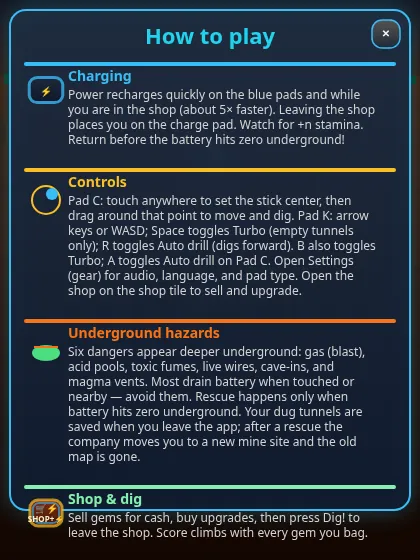
What it says, in short:
- Charging. Power refills on the blue charge pads, and about five times faster while you are in the shop. Leaving the shop puts you back on the charge pad.
- Controls. On keys (the game calls it Pad K), arrow keys or WASD move and dig. Space toggles Turbo, which works only in tunnels you have already dug. R toggles Auto drill, which keeps digging forward. On touch (Pad C) you touch anywhere to set the centre of a virtual stick and drag around it. Settings switches between the two and sets audio and language.
- Hazards. Deeper down there are six of them: gas that explodes, acid pools, toxic fumes, live wires, cave-ins and magma vents. Most drain your battery when you touch or pass near them.
- Rescue. It only happens when your battery hits zero underground. After a rescue the company moves you to a new mine site and the old map is gone.
Dig one: greedy, and it cost us everything
We started with a full battery of 700, an empty bag with room for 8 gems, $5 in cash and a depth limit of 300 m shown in the top-left corner.
We dug straight down. At 60 m the battery still read 504 of 700, and we had four gems. That felt like plenty, so we turned sideways and dug long tunnels left and right to grab every gem we could see.
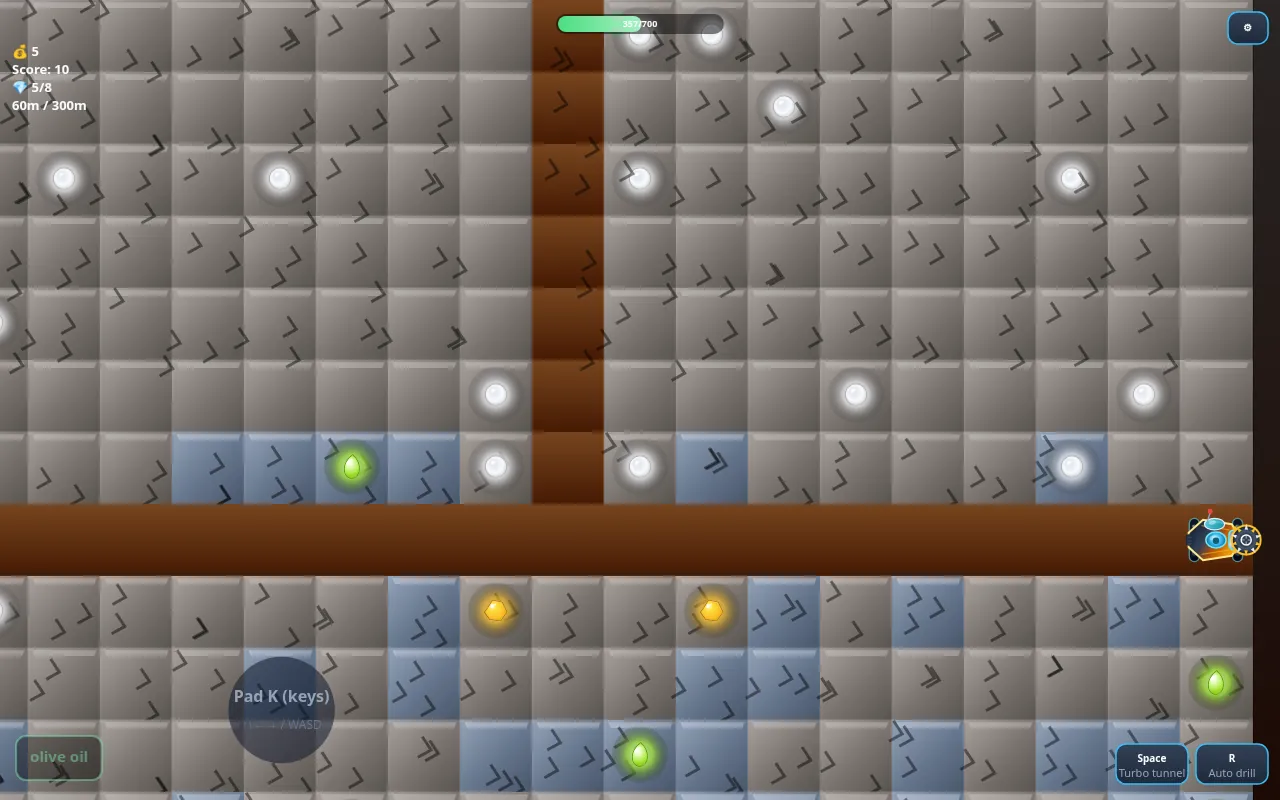
Side tunnels through rock are expensive. By the time the bag was full (8 of 8) we were at 72 m and the battery read 84 of 700, with a red warning across the top telling us to get back to the ground now.
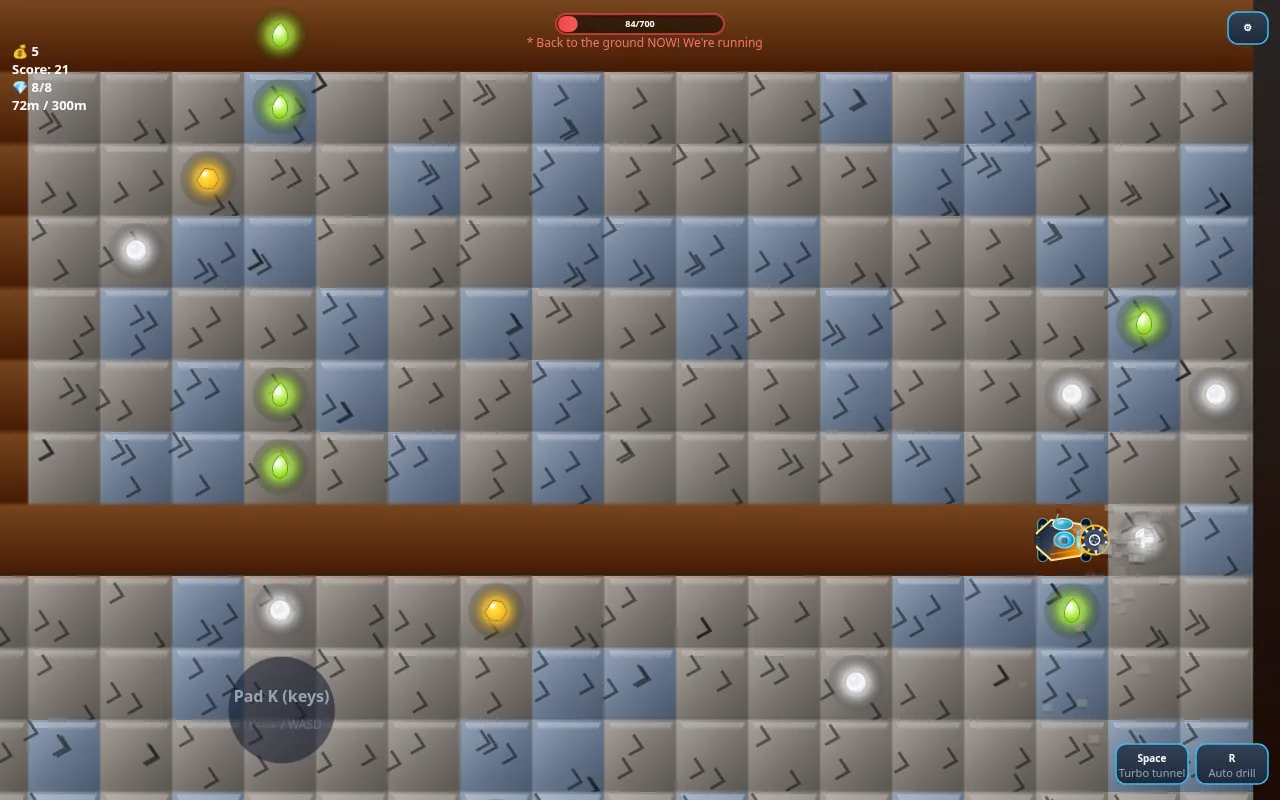
Instead of driving back through our own tunnels, we tried to drill straight up through fresh rock. The rescue card put us at 61 m when the battery died, so we climbed about 11 metres:
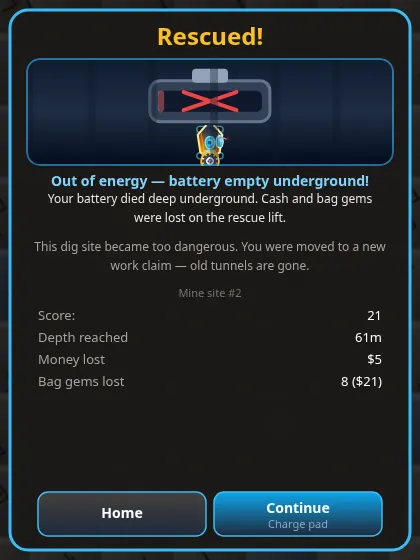
The rescue card is blunt. We lost the $5 we started with and all 8 gems, which the card valued at $21. The mine reset to site #2. The only thing we kept was our score of 21, which counts every gem you bag, sold or not.
Dig two: short, and it paid
On the new site we kept it small: straight down to 26 m, one short side tunnel, then back up the same shaft. We came home with only two gems and about 500 of 700 battery to spare. Driving onto the shop tile opened the shop, and the battery bar jumped back to 700 while we were inside.
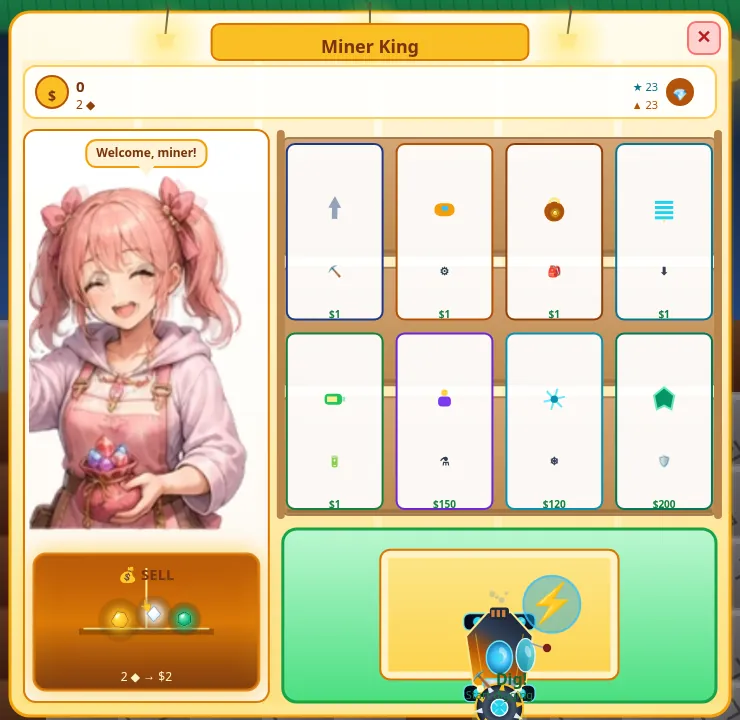
Two shallow gems sold for just $2, a lot less than the $21 the deep bag would have fetched. That was still enough for two first upgrades, because several level-one upgrades cost $1:
| Upgrade | What the card says | Level 0 → 1 | Next level |
|---|---|---|---|
| Drill Tip | Breaks stone layers faster | 13 → 11 for $1 | 11 → 9 for $51 |
| Bag | Carry more loot before selling | 8 → 16 for $1 | 16 → 24 for $10 |
| Drill Body | Stronger base digging power | 16 → 14 for $1 | not checked |
| Depth | Longer drill cables | 300 m → 700 m for $1 | not checked |
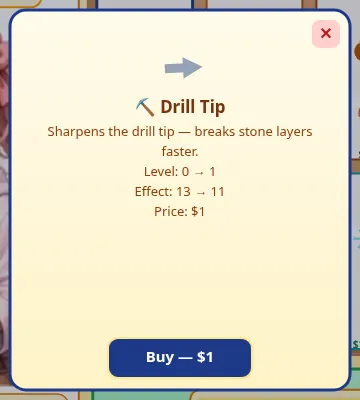
We bought the Drill Tip and the Bag. The next levels cost a lot more ($10 for the next Bag, $51 for the next Drill Tip), so the deep, valuable gems are where the real money is. You just have to bring them home.
Tips for your first trips
- Turn back at half battery. Going straight down to 60 m cost us about 200 of 700. The sideways digging that followed cost over 400. Plan the trip home before the bar is half empty, not when the warning appears.
- Go home through your own tunnels. Fresh rock is slow and drains power. The help says Turbo only works in tunnels you have already dug, so your own shaft is the quick way up.
- Spend your first dollars on $1 upgrades. A bigger bag doubles what one trip can carry, and the drill and depth upgrades are just as cheap at level one.
- Sell after every trip. A rescue costs you the cash you are holding as well as the gems in your bag, so leave money in upgrades rather than in your pocket.
- Deeper gems are worth more. Our eight gems from around 60 m were valued at $21; our two from 26 m sold for $2. Once the bag and drill are upgraded, those deeper trips are worth the risk.
On iPhone, iPad and Mac
On a phone or tablet you will be using the touch stick (Pad C) rather than keys, and the help also lists button shortcuts for Turbo and Auto drill. On a Mac we would expect the same keyboard controls we used, though we have not tried that build. Either way, the habit that matters is the one that cost us our first bag: watch the battery and leave early.